7 Creative Ways to Use the Tapo C120 (Beyond Front Door Monitoring)#
Last Updated: November 2025
Most people buy a security camera, stick it above their front door, and call it a day.
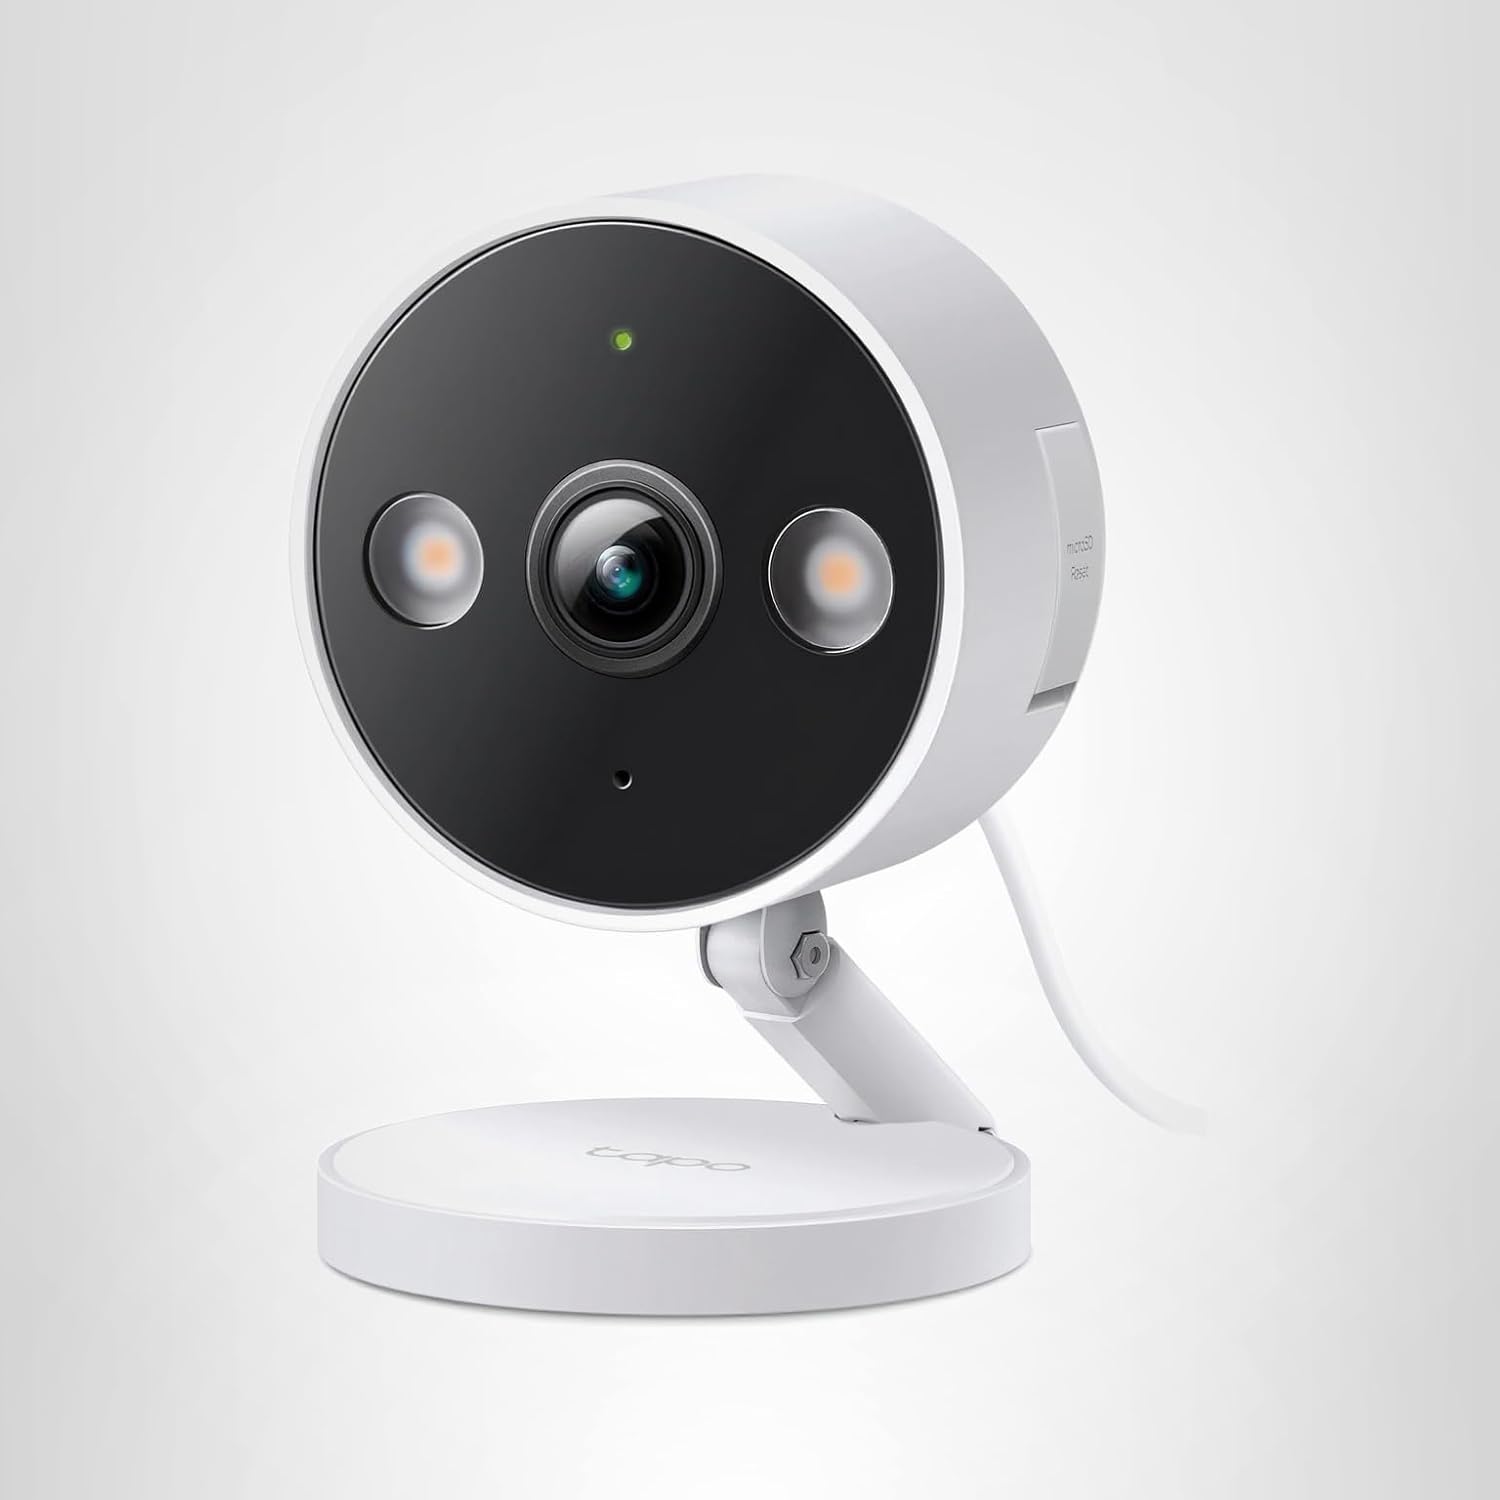
But the [Tapo C120](Tapo C120 on Amazon) can do so much more than watch for package thieves. With 2K resolution, free AI detection, color night vision, and weatherproof design, it's the Swiss Army knife of security cameras.
I've been experimenting with creative Tapo C120 installations for 6 months, and discovered 7 unexpected uses that go way beyond traditional security — from wildlife photography to workshop time-lapses.
Here's how to get 10x more value from your camera.
1. Backyard Wildlife Observatory (Automated Nature Documentary)#
The Setup#
Mount the Tapo C120 facing your bird feeder, vegetable garden, or any area where wildlife appears.
Recommended Settings:
- AI Detection: Pet Detection (triggers for squirrels, raccoons, deer)
- Activity Zones: Focus on feeding area only (exclude trees swaying in wind)
- Night Vision: Infrared Mode (doesn't disturb animals like spotlights would)
- Recording: Motion-Only (saves SD card space for just animal activity)
- Notifications: Disabled (or set to silent — unless you want alerts every time a squirrel visits)
What You'll Capture#
- Birds: Morning visits to feeders (robins, cardinals, blue jays)
- Mammals: Deer grazing at dawn, raccoons at night, squirrels stealing birdseed
- Unexpected guests: Foxes, coyotes, opossums, skunks (depends on your region)
- Time-lapse opportunities: Flowers blooming, seasons changing, weather patterns
Pro Tips#
- Mount camera low (4-6 feet) for eye-level animal footage
- Use camouflage tape or housing to blend camera into environment
- SD card management: 128GB card stores ~8-12 days of motion-only footage (enough to review weekly highlights)
Real User Example#
"I mounted a Tapo C120 near my bird feeder and discovered we have 17 different bird species visiting our yard. I made a compilation video for my kids' school science project." — Sarah M., Oregon
Why This Works: Unlike dedicated wildlife cameras ($150-300), the Tapo C120 gives you:
- ✅ Live viewing from your phone (check in real-time)
- ✅ Color footage during day (identify species by plumage)
- ✅ Instant notifications when animals appear
- ✅ Cost: $30-35 vs $150-300 for wildlife-specific cameras
[Get a Tapo C120 for wildlife monitoring →](Tapo C120 on Amazon)
2. Indoor Pet Camera (Dog Training & Entertainment)#
The Setup#
Place the Tapo C120 indoors pointing at your dog's favorite spot (crate, dog bed, play area).
Recommended Settings:
- AI Detection: Pet Detection (get alerts when your dog moves)
- Night Vision: Infrared Only (don't startle pets with spotlights)
- Two-Way Audio: Enabled (talk to your dog remotely)
- Motion Sensitivity: High (detect subtle movements like whining, pacing)
- Notifications: Enabled during work hours (know if your dog is anxious)
Use Cases#
Training Separation Anxiety#
Watch your dog's behavior when you leave:
- Does barking start immediately or after 30 minutes?
- Is your dog calm in the crate or pacing?
- Use two-way audio to soothe barking
Remote Check-Ins#
- See if your dog ate their food
- Verify dog walker showed up on time
- Check on sick/elderly dogs during the day
Entertainment#
- Catch funny moments (zoomies, toy destruction, sleeping positions)
- Compile video montages for social media
- Record training progress (before/after videos)
Pro Tips#
- Wide-angle placement: Mount camera in corner for maximum room coverage
- Treat tosser integration: Some pet owners mount camera near automatic treat dispensers (remote reward during training)
- Privacy concerns: Cover camera when home (Settings → Privacy Mode)
Real User Example#
"My dog has separation anxiety. The Tapo C120 helped me realize he only barks for 5 minutes after I leave, then sleeps all day. Huge relief!" — Mike T., Colorado
Why This Works: Dedicated pet cameras ($80-150) don't offer:
- ✅ 2K resolution (see details across room)
- ✅ Free cloud storage via SD card (no subscription fees)
- ✅ Color night vision option (for low-light rooms)
[Get a Tapo C120 for pet monitoring →](Tapo C120 on Amazon)
3. Garage Workshop Time-Lapse (Document Projects + Theft Prevention)#
The Setup#
Mount camera overlooking your workbench, tool wall, or project area.
Recommended Settings:
- AI Detection: People Detection (alert if someone enters garage)
- Recording: 24/7 Continuous (capture full project timeline)
- Night Vision: Spotlight Mode (bright light when you're working at night)
- Activity Zones: Focus on tool wall + workbench (exclude garage door area to avoid car headlight false alerts)
Use Cases#
Project Time-Lapses#
- Woodworking projects (watch table build from start to finish)
- Car restorations (months of progress in 2-minute videos)
- DIY home projects (bathroom remodel, deck building)
Tool Theft Prevention#
- Record who enters garage (delivery drivers, contractors, guests)
- Get instant alerts if garage accessed when you're away
- Clear footage of stolen tools for insurance/police
Workflow Optimization#
- Review your work process (find inefficiencies)
- Measure how long tasks actually take (vs estimated time)
- Share project videos on YouTube/Instagram
Pro Tips#
- Lighting matters: Add LED shop lights for consistent time-lapse footage
- Power management: Use power strip with surge protector (garages have voltage fluctuations)
- SD card size: 256GB+ for multi-month time-lapses (512GB for year-long projects)
Time-Lapse Export Process#
- Record 24/7 continuous footage for project duration (days/weeks/months)
- Download footage sections via Tapo app
- Use video editing software (DaVinci Resolve, iMovie, Adobe Premiere)
- Speed up footage: 1 hour of work = 1-2 minutes of video
Real User Example#
"I built a custom dining table over 3 months. The Tapo C120 captured every step. My time-lapse video got 50k views on YouTube!" — James L., Texas
Why This Works: Traditional time-lapse cameras ($200-500) lack:
- ✅ Remote viewing (check project progress from work)
- ✅ Security features (alerts if someone enters)
- ✅ Long recording capability (weeks/months on large SD card)
[Get a Tapo C120 for workshop time-lapses →](Tapo C120 on Amazon)
4. Garden Protection (Stop Deer, Rabbits & Thieves)#
The Setup#
Mount camera overlooking vegetable garden, flower beds, or fruit trees.
Recommended Settings:
- AI Detection: Pet Detection (detects deer, rabbits, raccoons)
- Night Vision: Spotlight Mode (deterrent effect — animals avoid bright lights)
- Motion Sensitivity: High (detect small animals like rabbits)
- Activity Zones: Garden beds only (exclude surrounding grass)
- Two-Way Audio: Enabled (yell "Get out!" to scare animals remotely)
Use Cases#
Pest Deterrence#
- Spotlights activate when deer/rabbits approach
- Two-way audio lets you scare animals away from your phone
- Identify which animals are causing damage (deer vs rabbits vs groundhogs)
Harvest Monitoring#
- Know exactly when vegetables ripen (daily check-ins)
- Catch tomato thieves (neighborhood kids, not just animals)
- Document garden growth progress (time-lapse from seed to harvest)
Weather Damage Assessment#
- Check garden after storms without walking outside
- Assess hail/wind damage remotely
- Plan repairs based on footage
Pro Tips#
- Combine with motion-sensor sprinkler: When camera detects animal, trigger sprinkler system (requires home automation setup)
- Mount high enough: Deer can knock down low-mounted cameras
- Use solar panel: If power outlet isn't near garden, consider solar-powered WiFi extender + camera
Real User Example#
"Deer were destroying my tomatoes nightly. The Tapo C120's spotlights + two-way audio scared them off. Haven't lost a plant since!" — Linda K., Pennsylvania
Why This Works: Garden-specific cameras ($100-200) don't have:
- ✅ Two-way audio (remotely scare pests)
- ✅ Bright spotlights (deterrent effect)
- ✅ AI detection (filter out wind/trees)
[Get a Tapo C120 for garden protection →](Tapo C120 on Amazon)
5. Driveway License Plate Capture (Visitor Log & Hit-and-Run Evidence)#
The Setup#
Mount camera at driveway entrance, angled to capture front of incoming vehicles.
Recommended Settings:
- AI Detection: Vehicle Detection (alert for every car entering driveway)
- Night Vision: Spotlight Mode (essential for license plate visibility)
- Recording: 24/7 Continuous (capture all vehicles, even if not triggering AI)
- Activity Zones: Driveway entrance only (exclude street traffic)
- Notifications: Enabled (know who's arriving)
Use Cases#
Visitor Logging#
- Automatic log of every car that visits your property
- Timestamps for contractor arrivals/departures
- Verify service appointments (plumber, electrician, lawn care)
Hit-and-Run Evidence#
- Capture license plates of vehicles that damage mailbox, trash cans, or parked cars
- Provide footage to police/insurance
- Identify repeat offenders (speeding neighbors, delivery damage)
Package Delivery Verification#
- Know which delivery service dropped off packages (UPS, FedEx, Amazon)
- Prove delivery times (for dispute resolution)
- Capture vehicle descriptions for theft investigations
Pro Tips#
- Angle is critical: Camera must be perpendicular to vehicle path (not head-on) to capture plate
- Height: Mount 6-8 feet high, angled downward 30-40 degrees
- Test at night: Ensure spotlights illuminate license plate area (adjust brightness to 100% if needed)
- 2K resolution essential: 1080p cameras often can't resolve license plate characters from 20+ feet
Real User Example#
"A delivery driver backed into my mailbox and drove off. The Tapo C120 captured his license plate in full 2K detail. Insurance paid for replacement." — Robert D., Florida
Why This Works: License plate cameras ($150-400) are overkill for residential use:
- ✅ 2K resolution captures plates from 25-30 feet
- ✅ Spotlights eliminate need for external IR illuminators
- ✅ AI vehicle detection filters out pedestrians/pets
[Get a Tapo C120 for driveway monitoring →](Tapo C120 on Amazon)
6. Vacation Property / Cabin Monitoring (Remote Peace of Mind)#
The Setup#
Install Tapo C120 at vacation home, cabin, RV, or rental property.
Recommended Settings:
- AI Detection: People Detection (alert if anyone enters property)
- Recording: 24/7 Continuous (capture all activity during absence)
- Night Vision: Smart Mode (conserve power when possible)
- Motion Sensitivity: High (detect trespassers at maximum range)
- Notifications: Enabled 24/7 (you want to know immediately if someone's there)
Use Cases#
Break-In Detection#
- Instant alerts if trespassers appear
- Live view lets you verify emergency vs false alarm
- Call police with real-time footage ("Someone is breaking into my cabin RIGHT NOW")
Property Damage Monitoring#
- Check on property after storms (fallen trees, roof damage)
- Verify snow accumulation (know if you need to hire plow service)
- Monitor for water leaks (if camera indoors)
Rental Property Management#
- Verify cleaning crew showed up
- Ensure guests checked out on time
- Catch property damage during rental period (for security deposit claims)
Pro Tips#
- Low-bandwidth mode: Settings → Video Quality → Standard (reduces data usage for remote areas with weak cell signal)
- Solar panel option: Pair camera with portable solar panel + power bank (for off-grid locations)
- Cellular WiFi hotspot: Use 4G/5G hotspot if property has no internet (T-Mobile/Verizon unlimited data plans)
- Multiple cameras: 2-3 cameras for comprehensive coverage (~$75-100 total vs $300-500 for professional system)
Real User Example#
"Our cabin is 4 hours away. The Tapo C120 lets us check on it daily. Caught trespassers using our dock — called sheriff from home." — Karen S., Minnesota
Why This Works: Vacation property cameras ($100-250 per camera) require:
- ✅ No monthly subscriptions (local SD card recording)
- ✅ Remote viewing from anywhere (via Tapo app)
- ✅ Weatherproof design (survives harsh conditions)
[Get a Tapo C120 for vacation property monitoring →](Tapo C120 on Amazon)
7. Package Delivery Verification (Stop Theft & Disputes)#
The Setup#
Mount camera directly above porch/doorstep, angled downward to capture ground level.
Recommended Settings:
- AI Detection: Package Detection (alert specifically when box appears)
- Night Vision: Spotlight Mode (capture delivery driver faces clearly)
- Activity Zones: Porch area only (exclude sidewalk/street)
- Recording: 24/7 Continuous (capture delivery + any theft attempts)
- Notifications: Enabled 7 AM - 11 PM (delivery hours)
Use Cases#
Theft Evidence#
- Record package thieves in full 2K color detail
- Capture faces, clothing, and vehicle descriptions
- Provide footage to police (often leads to arrests)
Delivery Disputes#
- Prove delivery time (for refund disputes with Amazon/eBay)
- Verify delivery location (some drivers leave packages in wrong spot)
- Catch "missing package" scams (delivery driver claims delivered, but didn't)
Signature Verification#
- Zoom in on package labels (verify correct address)
- Confirm fragile packages were handled properly
- Document damaged package conditions at delivery
Pro Tips#
- Two-way audio: Thank delivery drivers via speaker ("Thanks for delivering!")
- Package detection: Tapo C120's AI specifically recognizes boxes (more accurate than generic motion detection)
- Timestamps: Footage includes date/time stamp for dispute resolution
Real User Example#
"Amazon claimed they delivered my $400 laptop, but I never got it. Tapo C120 footage proved it was never delivered. Got full refund." — Chris M., California
Why This Works: Unlike video doorbells ($150-250):
- ✅ Wider field of view (captures entire porch, not just doorbell area)
- ✅ No subscription required for package detection AI
- ✅ Higher mounting flexibility (can aim directly downward at ground)
[Get a Tapo C120 for package monitoring →](Tapo C120 on Amazon)
Multi-Camera System: Maximize Coverage for $100-150#
One camera is useful. 3-4 strategically placed cameras give you complete property coverage.
Recommended 3-Camera Setup (Total: ~$90-105)#
- Front Door: Package theft prevention + visitor identification
- Driveway: Vehicle monitoring + license plate capture
- Backyard: Wildlife/pet monitoring + perimeter security
Recommended 4-Camera Setup (Total: ~$120-140)#
- Front Door: Package monitoring
- Driveway Left Side: Vehicle entrance
- Driveway Right Side: Vehicle exit (full license plate coverage)
- Backyard: Wildlife + rear entry monitoring
Cost Comparison vs Traditional Systems#
Tapo C120 (4 cameras) : Upfront: $120-140 | Monthly: $0 | 3-Year Total: $120-140
Ring (4 cameras) : Upfront: $400-600 | Monthly: $10/month | 3-Year Total: $760-960
Professional installation : Upfront: $800-1500 | Monthly: $20-40/month | 3-Year Total: $1520-2940
Savings with Tapo C120: $600-2800 over 3 years for 4-camera setup.
Creative Use Tips for All Scenarios#
Tip 1: Name Cameras Descriptively#
Instead of "Camera 1", use:
- "Front Door Porch"
- "Driveway Entrance"
- "Backyard Bird Feeder"
- "Garage Workbench"
Why: Instantly know which camera triggered alert without opening app.
Tip 2: Create Custom Notification Sounds#
Most smartphones let you set custom sounds per app/notification:
- Front Door: Doorbell chime
- Driveway: Car horn
- Backyard: Bird chirp
- Garage: Tool sound
Why: Know which camera alerted you without looking at phone.
Tip 3: Share Camera Access with Family#
Tapo app supports multiple users:
- Spouse: Full access to all cameras
- Kids: View-only access (no settings changes)
- Pet sitter: Temporary access to indoor pet camera only
Path: Tapo App → Camera → Settings → Share Device
Tip 4: Schedule Privacy Mode#
Don't want cameras recording during family gatherings?
Enable scheduled privacy mode: Settings → Privacy Mode → Schedule
- Disable Friday 6 PM - 10 PM (dinner parties)
- Disable Sunday 12 PM - 4 PM (backyard BBQs)
Tip 5: Export Highlight Reels#
Create monthly compilation videos:
- Review SD card playback for interesting clips (wildlife, funny pets, project progress)
- Download clips to phone (Tapo app → Playback → Download)
- Use video editor (iMovie, DaVinci Resolve) to compile highlights
- Share on social media or with family
Frequently Asked Questions#
Can I use Tapo C120 indoors?#
Yes! Despite being outdoor-rated, it works perfectly indoors for pet monitoring, workshop surveillance, or nursery cameras. The only downside: spotlights may be too bright for indoor use (switch to IR mode).
How many cameras can I add to one account?#
Unlimited. The Tapo app supports as many cameras as you want on a single account.
Can I view multiple cameras simultaneously?#
Yes. The Tapo app has a "grid view" showing 4-9 cameras on one screen (device-dependent).
Do I need separate SD cards for each camera?#
Yes, each camera needs its own microSD card for local recording. Budget ~$15-20 per 128GB card.
Can I access cameras from multiple phones?#
Yes. Share camera access with family members using "Share Device" feature in settings.
Will cameras work if internet goes down?#
Yes for recording (footage saves to SD card), but no for remote viewing (you need internet to access live feed from phone).
Inspiration: Real User Setups#
The Wildlife Enthusiast (3 Cameras: $90)#
- Backyard bird feeder (IR mode, motion-only recording)
- Garden bed (spotlight mode, pest deterrence)
- Trail entrance (IR mode, capture deer/foxes)
Result: Documented 23 different species over 6 months, created nature documentary for YouTube.
The DIY Woodworker (2 Cameras: $60)#
- Workshop overhead (24/7 time-lapse)
- Tool wall (theft prevention)
Result: Built dining table over 3 months, compiled 4-minute time-lapse, shared on Instagram (15k views).
The Pet Parent (2 Cameras: $60)#
- Living room (dog monitoring while at work)
- Backyard (outdoor play area)
Result: Verified dog walker showed up on time, caught funny dog moments for TikTok.
The Vacation Property Owner (4 Cameras: $120)#
- Cabin front entrance (trespasser alerts)
- Dock area (watercraft monitoring)
- Deck (property damage checks)
- Driveway (vehicle tracking)
Result: Caught trespassers using dock, provided footage to police, prevented $500+ in dock damage.
The [Tapo C120's versatility](Tapo C120 on Amazon) goes far beyond simple security monitoring. With 2K resolution, free AI detection, color night vision, and weatherproof design, it's the perfect tool for wildlife observation, project documentation, pet surveillance, and property management.
One camera for security monitoring is useful. Multiple cameras for creative purposes is transformative.
Ready to explore creative uses for your Tapo C120? [Get one (or three) on Amazon](Tapo C120 on Amazon) and discover what you'll capture.