Tapo C120 Complete Setup Guide: From Box to Perfect Configuration in 15 Minutes#
Last Updated: November 2025
Most security camera manuals assume you're a tech expert. They're not. You just want a working camera that doesn't bombard you with 100 false alerts per day.
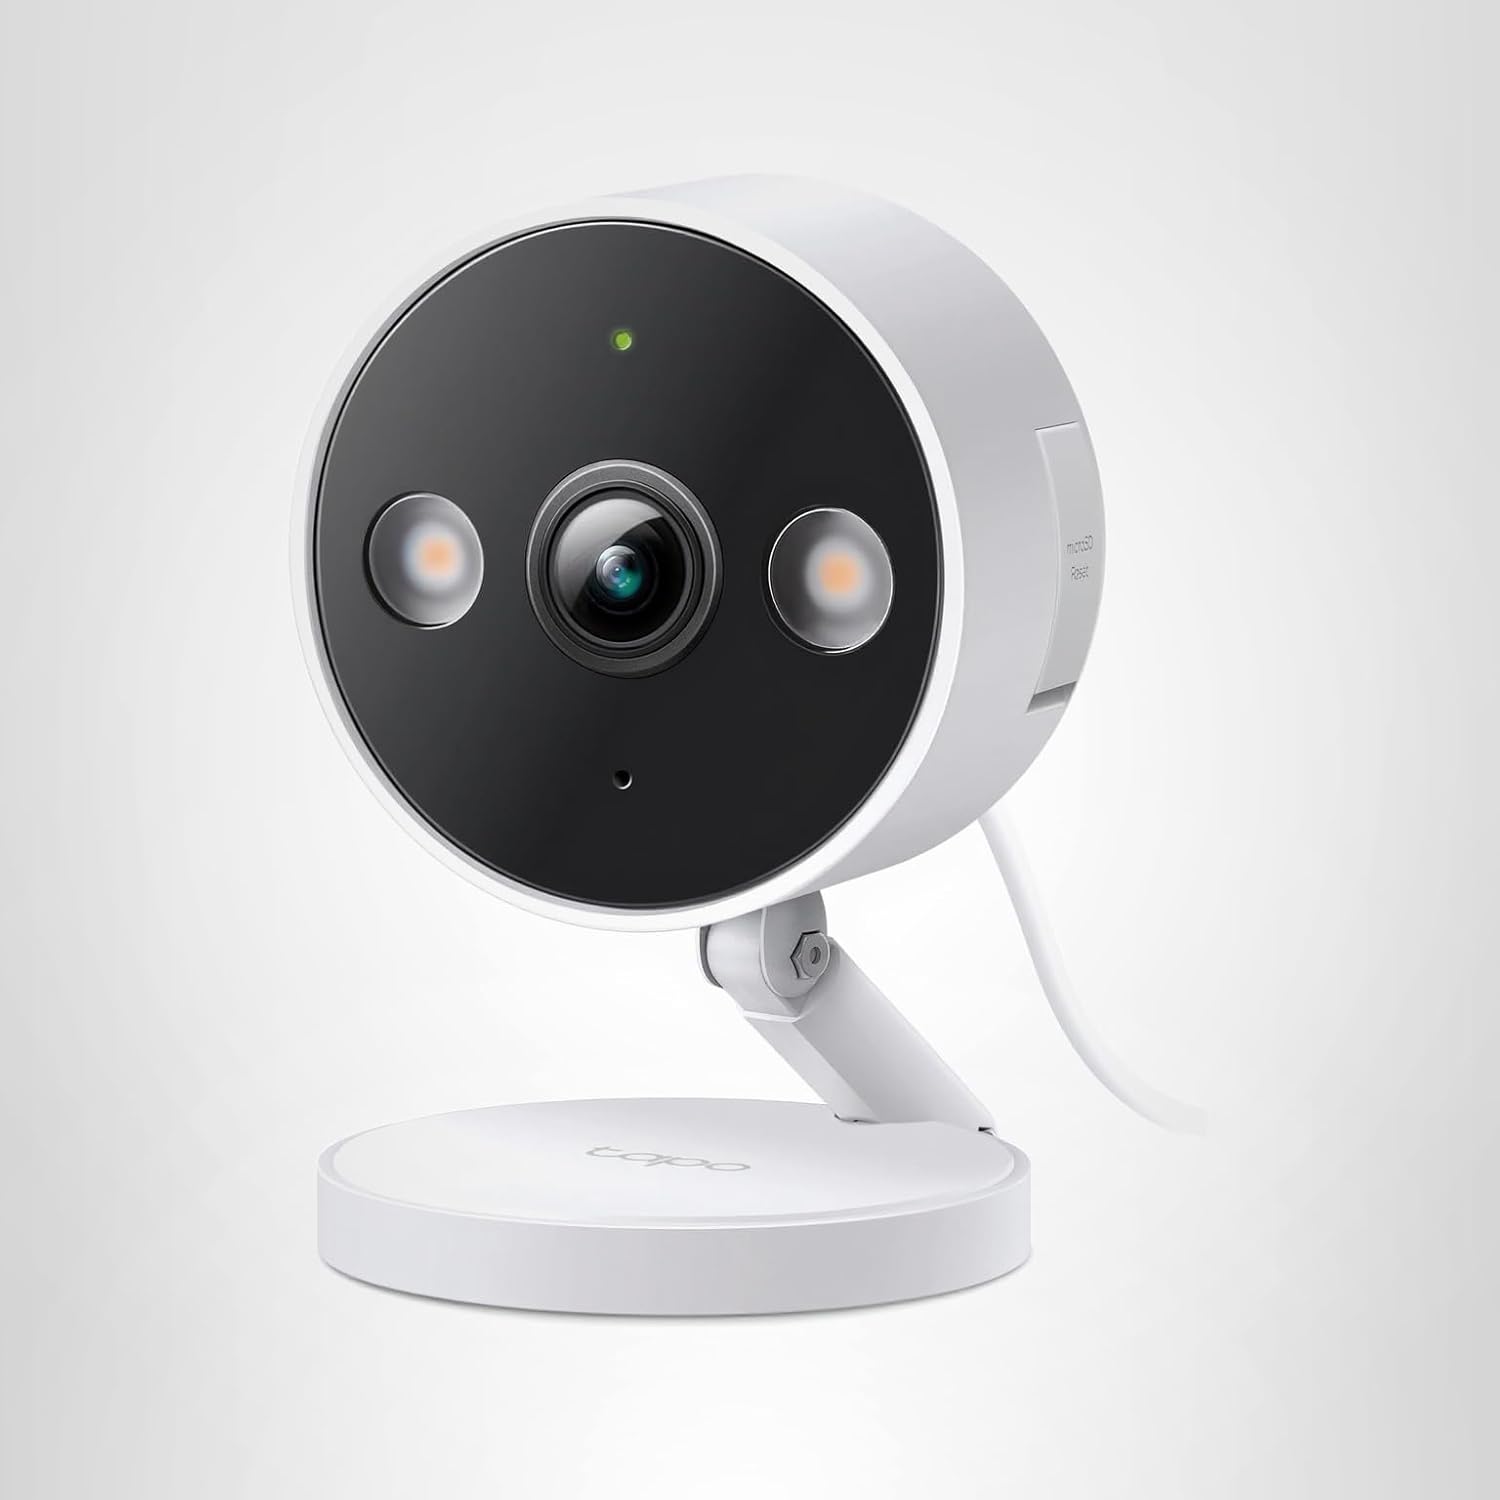
This guide walks you through every single step of setting up the [Tapo C120](Tapo C120 on Amazon) — from unboxing to optimized configuration — in plain English.
By the end of this 15-minute setup, you'll have:
- Camera installed and recording
- AI detection reducing false alerts by 85%
- Optimal camera placement for your specific needs
- Smart notifications (only when it matters)
What's In the Box?#
Tapo C120 Package Contents:#
- Tapo C120 Camera (main unit)
- Magnetic Mounting Base (tool-free installation option)
- Screw Mount Kit (permanent installation)
- 3x mounting screws
- 3x wall anchors
- 10-foot Power Cable (weatherproof, attached to camera)
- Power Adapter (5V/1A, US plug)
- Quick Start Guide (basic instructions)
- Mounting Template (paper sticker for drilling alignment)
What's NOT Included (You May Need):#
- MicroSD card (for local recording — recommended 128GB Class 10)
- Outdoor power outlet or extension cord (camera is wired-only)
- Screwdriver (if using screw mount instead of magnetic)
MicroSD Card Recommendation: SanDisk High Endurance 128GB (~$15 on Amazon). Designed for continuous recording, lasts 2-3 years.
Pre-Installation Checklist#
Before you start, verify these requirements:
WiFi Requirements#
- 2.4GHz WiFi network (Tapo C120 does NOT support 5GHz)
- WPA/WPA2 security (unsecured or WPA3-only networks won't work)
- WiFi password (have it ready for app setup)
- Strong signal at camera location (test with your phone's WiFi strength indicator)
How to check: Stand where you'll mount the camera, check your phone's WiFi signal. 2-3 bars minimum.
Power Requirements#
- Outdoor power outlet within 10 feet of camera location
- OR weatherproof extension cord (if outlet is farther)
- OR outdoor-rated power strip (for multi-camera setups)
Power consumption: ~3-4 watts idle, ~8-10 watts with spotlights active. Electricity cost: ~$5-8/year.
App Requirements#
- Smartphone (iPhone or Android)
- Tapo app (free, download from App Store or Google Play)
- TP-Link account (created during app setup, free)
Step-by-Step Installation#
Step 1: Download Tapo App#
For iPhone:
- Open App Store
- Search "Tapo"
- Download "TP-Link Tapo" (official app)
For Android:
- Open Google Play Store
- Search "Tapo"
- Download "TP-Link Tapo" (official app)
Important: Download the TP-Link Tapo app, not "Tapo Cam" or other unofficial apps.
Step 2: Create TP-Link Account#
- Open Tapo app
- Tap "Sign Up"
- Enter email address
- Create password (8+ characters)
- Verify email (check inbox for confirmation code)
Pro Tip: Use a password manager (1Password, LastPass, Bitwarden) to generate and save your password securely.
Step 3: Add Camera to App (Before Physical Installation)#
Why do this first: It's easier to pair the camera while it's on a table near your WiFi router, then install it in the final location.
- Plug camera into power outlet (near your WiFi router)
- Wait 30 seconds for camera to boot (LED blinks red/green)
- Open Tapo app
- Tap "+" (Add Device)
- Select "Cameras" → "Tapo C120"
- Follow on-screen instructions:
- WiFi Setup: Select your 2.4GHz network, enter password
- QR Code Pairing: Hold phone's QR code in front of camera lens (6-12 inches away)
- Camera Naming: Choose name (e.g., "Front Door", "Driveway", "Backyard")
Troubleshooting WiFi pairing:
- Camera LED blinks red/green = ready to pair
- Camera LED solid green = already paired (skip to Step 4)
- Can't find camera = Ensure phone is on 2.4GHz WiFi (not 5GHz)
Step 4: Test Camera Before Mounting#
Before you drill holes or climb a ladder, verify everything works:
- Live View Test: Tap camera in app → Watch live feed (should appear within 5 seconds)
- Two-Way Audio Test: Tap microphone icon → Speak → Listen for sound from camera
- Night Vision Test: Cover camera lens with hand → Spotlights should activate
- Recording Test: Check playback tab → Verify recordings appear (if SD card inserted)
If anything doesn't work, troubleshoot NOW before installation.
Step 5: Choose Camera Placement#
Optimal Mounting Height: 8-10 feet high
- Higher = wider field of view
- Lower = better face detail
- 8-10 feet balances both
Angle: 15-30 degrees downward
- Prevents water pooling on lens
- Captures faces and license plates better than horizontal view
Avoid:
- Facing directly into sun (lens flare, washed-out footage)
- Within reach of ground level (easy to vandalize)
- Behind window glass (glare, motion detection won't work)
- Under bright porch lights (overexposed footage at night)
Ideal Locations:
- Under eaves/overhangs (weather protection)
- Corner mounts (cover two sides of house)
- Above doors (monitor entry/exit)
Step 6: Physical Installation (Choose Method)#
Method A: Magnetic Mount (No Tools, Temporary)#
Best for: Renters, testing different angles, metal surfaces
Steps:
- Clean mounting surface (wipe dust/dirt)
- Stick magnetic base to surface (or attach to metal beam)
- Attach camera to magnetic base (snaps on with magnet)
- Adjust camera angle by pivoting ball joint
- Route power cable to outlet (create drip loop below camera)
Pros: No drilling, easily repositionable Cons: Less secure (can be knocked off), limited surfaces
Method B: Screw Mount (Permanent, Secure)#
Best for: Homeowners, permanent installation, any surface
Steps:
-
Mark drill holes:
- Use included mounting template (tape to wall)
- OR hold base against wall, mark screw holes with pencil
-
Drill pilot holes:
- Use 3/16" drill bit (slightly smaller than anchors)
- Drill 1.5-2 inches deep
- Clean dust from holes
-
Insert wall anchors:
- Tap anchors into holes with hammer (should be flush with wall)
-
Attach mounting base:
- Align base with anchors
- Insert screws through base into anchors
- Tighten screws (don't overtighten — plastic base can crack)
-
Attach camera to base:
- Snap camera onto base (ball joint connection)
- Tighten adjustment screw on base (locks angle)
-
Route power cable:
- Cable exits from bottom of camera
- Create drip loop below camera (prevents water traveling up cable)
- Secure cable with outdoor-rated cable clips
Drip loop description: Route the power cable downward from the camera, creating a U-shaped loop below the camera before connecting to the outlet. Water will drip off at the lowest point of the loop instead of running into the camera housing.
Step 7: Insert MicroSD Card (Strongly Recommended)#
Why you need it: Without an SD card, the camera only stores 12-second cloud clips (useless for investigations).
Steps:
- Locate SD card slot (bottom of camera, under rubber flap)
- Insert microSD card (push until it clicks, gold contacts facing camera)
- Close rubber flap (ensures waterproofing)
- Format SD card in app:
- Tapo App → Camera Settings → Storage → Format SD Card
Storage Capacity Guide:
- 32GB: ~2-3 days of 24/7 recording
- 64GB: ~4-6 days
- 128GB: ~8-12 days (recommended)
- 256GB: ~15-20 days
- 512GB: ~30-40 days (maximum supported)
Recording Mode: Settings → Recording → Continuous (24/7) vs Motion-Only
- Continuous: Uses full SD card capacity, overwrites oldest footage
- Motion-Only: Only records when motion detected (saves storage, but may miss events)
App Configuration (Optimization)#
Step 8: Enable AI Detection (Reduce False Alerts)#
Path: Tapo App → Camera → Settings → Detection & Alerts → AI Detection
Recommended Settings:
- Enable AI Detection: Toggle ON
- Select Detection Types:
- People (essential for security)
- Package (for delivery monitoring)
- Pet (only if you want pet alerts — otherwise, disable to reduce alerts)
- Vehicle (only for driveway monitoring)
Why this matters: Without AI detection, you'll get 80-100 false alerts per day from trees, shadows, and passing cars.
Step 9: Configure Activity Zones (CRITICAL)#
Path: Settings → Detection & Alerts → Activity Zones
What to do:
- Tap "Activity Zones"
- Draw a polygon around ONLY the areas you want to monitor:
- Your porch
- Your driveway (if monitoring vehicles)
- Your yard
- Exclude:
- Public sidewalks
- Streets (passing cars)
- Neighbor's property
- Trees/bushes that sway
Activity zone strategy: For a front door camera, exclude the street and public sidewalk from your activity zone. Only monitor your porch and driveway to prevent alerts from passing pedestrians and vehicles.
Pro Tip: Draw activity zone SMALLER than you think. You can always expand later.
Step 10: Adjust Motion Sensitivity#
Path: Settings → Detection & Alerts → Motion Sensitivity
Slider: Low / Medium / High
How to choose:
- High: Detects distant people, small movements (more false alerts)
- Medium: Balanced (recommended starting point)
- Low: Only large, obvious motion (may miss distant activity)
My recommendation: Start with Medium, then adjust based on alert frequency over first 24 hours.
Step 11: Set Notification Schedule#
Path: Settings → Notifications → Notification Schedule
Why: You probably don't need alerts at 3 AM when you're asleep.
Example Schedules:
Front Door (Package Monitoring):
- Monday-Friday: 7:00 AM - 10:00 PM (alerts enabled)
- Saturday-Sunday: 8:00 AM - 11:00 PM
- Overnight: Silent recording (no alerts, but still records)
Backyard (Pet Monitoring):
- Daily: 6:00 AM - 11:00 PM (when pets are outdoors)
- Overnight: Disabled (pets are indoors)
Driveway (Vehicle Security):
- 24/7 alerts enabled (unusual car activity at night is suspicious)
Step 12: Configure Night Vision Mode#
Path: Settings → Night Vision
Options:
- Spotlight Mode: Full-color night vision (dual spotlights activate on motion)
- Infrared Mode: Traditional grayscale night vision (silent, covert)
- Smart Mode: Automatic (uses ambient light when available, spotlights when needed)
Recommendations by Location:
- Front door: Spotlight Mode (identify package thieves with color footage)
- Backyard: Infrared Mode (don't disturb wildlife, covert monitoring)
- Driveway: Smart Mode (balance detection + battery savings)
- Side yard: Spotlight Mode (deterrent effect for trespassers)
Spotlight Brightness: Settings → Night Vision → Brightness (50% / 75% / 100%)
- Start with 75%, adjust down if neighbors complain about brightness
Step 13: Enable Rich Notifications (Thumbnail Previews)#
Path: Settings → Notifications → Rich Notifications
Enable: Toggle ON
What it does: Shows thumbnail preview of what triggered alert (before you open app)
Example:
- Basic notification: "Motion detected at Front Door"
- Rich notification: "Person detected at Front Door" + [thumbnail image]
Why: You can instantly see if alert is important WITHOUT opening app.
Step 14: Set Up Cloud Storage (Optional, NOT Required)#
The Tapo C120 works perfectly with local SD card storage only (no cloud subscription needed).
Cloud options (if you want off-site backup):
- Tapo Care: $3-5/month per camera (30-day cloud storage)
- Free trial: 30 days free cloud storage (auto-cancels, no credit card required)
My recommendation: Skip cloud storage. Local SD card is sufficient for 99% of users and saves $36-60/year.
Optimal Settings by Use Case#
Front Door / Package Monitoring#
AI Detection : People + Package
Activity Zones : Porch + front steps only
Motion Sensitivity : Medium
Night Vision : Spotlight Mode (100% brightness)
Notification Schedule : 7 AM - 11 PM
Recording Mode : 24/7 Continuous
Backyard / Pet Surveillance#
AI Detection : Pet + People
Activity Zones : Entire yard (exclude fences)
Motion Sensitivity : High (detect small pets)
Night Vision : Infrared Mode (don't disturb pets)
Notification Schedule : 6 AM - 11 PM
Recording Mode : Motion-Only (save SD card space)
Driveway / Vehicle Monitoring#
AI Detection : Vehicle + People
Activity Zones : Driveway only (exclude street)
Motion Sensitivity : Medium-High
Night Vision : Spotlight Mode (capture license plates)
Notification Schedule : 24/7 (unusual vehicle activity at night is important)
Recording Mode : 24/7 Continuous
Side Yard / Trespasser Detection#
AI Detection : People ONLY
Activity Zones : Side yard walkway (tight zone)
Motion Sensitivity : High (detect anyone approaching)
Night Vision : Smart Mode (balance detection + deterrence)
Notification Schedule : 24/7 (trespassing can happen anytime)
Recording Mode : 24/7 Continuous
Troubleshooting Common Setup Issues#
Problem: Can't Connect to WiFi#
Possible causes:
- Camera is trying to connect to 5GHz network (Tapo C120 only supports 2.4GHz)
- WiFi password incorrect
- WiFi signal too weak at camera location
- Router has MAC address filtering enabled
Solutions:
-
Check WiFi frequency:
- Go to phone's WiFi settings
- Verify you're connected to 2.4GHz network (not 5GHz)
- If your router combines 2.4GHz and 5GHz into one name, temporarily disable 5GHz in router settings
-
Double-check password:
- WiFi passwords are case-sensitive
- Avoid special characters that may cause issues (@, #, $)
-
Test signal strength:
- Stand at camera location
- Check phone's WiFi signal (2-3 bars minimum)
- If weak, add WiFi extender or move router closer
-
Check router settings:
- Disable MAC address filtering (or add camera's MAC to allowed list)
- Enable WPA2 security (WPA3-only won't work)
Problem: Camera Shows Offline in App#
Possible causes:
- WiFi network issue
- Camera lost power
- Router restarted (camera didn't reconnect)
- Firmware update in progress
Solutions:
- Check power: Verify camera LED is lit (green = online, red/blinking = offline/pairing mode)
- Restart camera: Unplug power for 10 seconds, plug back in, wait 60 seconds
- Restart router: Unplug router for 30 seconds, plug back in
- Re-add camera: If still offline after 5 minutes, delete camera from app and re-pair
Problem: Excessive False Alerts#
Causes:
- AI detection not enabled
- Activity zones too large (including street/sidewalk)
- Motion sensitivity too high
Solutions:
- Enable AI detection: Settings → AI Detection → People-only
- Shrink activity zones: Exclude public areas, trees, streets
- Lower sensitivity: Settings → Motion Sensitivity → Medium or Low
- Disable alerts for specific times: Notification Schedule → Exclude windy afternoons
Problem: Night Footage Too Dark#
Causes:
- Night vision mode disabled
- Spotlight brightness too low
- Camera facing away from area you want to illuminate
- Lens dirty (dust, spider webs)
Solutions:
- Enable night vision: Settings → Night Vision → Spotlight Mode
- Increase brightness: Settings → Night Vision → Brightness (100%)
- Adjust camera angle: Point camera more directly at area of interest
- Clean lens: Wipe lens dome with microfiber cloth
Problem: SD Card Not Detected#
Causes:
- SD card not fully inserted
- SD card incompatible (wrong format, too large, too slow)
- SD card defective
Solutions:
- Reinsert SD card: Remove card, push firmly until it clicks
- Format in app: Settings → Storage → Format SD Card (erases all data)
- Check compatibility:
- Use Class 10 or UHS-I card (minimum 10MB/s write speed)
- Maximum size: 512GB
- Use "High Endurance" cards (designed for continuous recording)
- Test with different card: Try known-good SD card from another device
Problem: Camera Reboots Randomly#
Causes:
- Power supply issue (loose connection, voltage drop)
- Overheating (if mounted in direct sun)
- Firmware bug
Solutions:
- Check power connections:
- Ensure cable firmly plugged into camera and adapter
- Test with different outlet (avoid GFCI outlets that may trip)
- Improve ventilation:
- Add sunshade if camera in direct sun
- Ensure camera isn't enclosed (needs airflow)
- Update firmware:
- Settings → Device Info → Firmware Update
- TP-Link releases bug fixes regularly
Advanced Tips for Power Users#
Tip 1: Use Multiple Cameras on One Account#
The Tapo app supports unlimited cameras on one account. Add multiple cameras for complete home coverage.
Naming strategy:
- "Front Door"
- "Driveway Left"
- "Driveway Right"
- "Backyard North"
- "Backyard South"
Group cameras by location for easier viewing.
Tip 2: Create Drip Loop for Cable Management#
To prevent water traveling up power cable into camera:
- Route cable DOWN from camera (not sideways or up)
- Create a loop 6-12 inches below camera (lowest point)
- Secure cable with outdoor-rated clips
- Water drips off loop, never reaches camera
Tip 3: RTSP Stream for NVR Integration#
Power users can access RTSP stream for integration with home automation:
Enable RTSP: Settings → Advanced Settings → Camera Account → Create RTSP Username/Password
RTSP URL format:
rtsp://username:password@camera-ip:554/stream1
Use cases:
- View camera in Home Assistant
- Record to NAS (Network Attached Storage)
- View on desktop VLC player
Tip 4: Scheduled Reboot (Prevent Issues)#
Set camera to reboot weekly (clears cache, prevents slow-downs):
Path: Settings → Advanced Settings → Reboot Schedule → Weekly at 3 AM
Tip 5: Privacy Mode (Disable Recording Temporarily)#
Hosting a party and don't want guests on camera?
Enable Privacy Mode: Settings → Privacy Mode (toggle ON)
- Camera lens cover closes
- Recording pauses
- Live view disabled
Re-enable when guests leave.
Maintenance Schedule#
Weekly:#
- Quick lens wipe (microfiber cloth)
Monthly:#
- Check mounting screws (tighten if loose)
- Deep clean lens (lens cleaning solution)
Every 6 Months:#
- Check SD card health (Settings → Storage → SD Card Status)
- Inspect power cable for wear
- Update firmware if available
Annually:#
- Replace SD card (prevent wear-out failures)
- Full camera inspection (seals, housing, cable)
Final Checklist: Is Your Camera Fully Optimized?#
- Camera mounted 8-10 feet high, angled 15-30° downward
- WiFi signal strong (2-3+ bars at camera location)
- AI detection enabled (People + Package for front door)
- Activity zones configured (exclude public areas)
- Motion sensitivity set (Medium as starting point)
- Night vision mode chosen (Spotlight for most scenarios)
- Notification schedule configured (avoid alert fatigue)
- MicroSD card inserted and formatted (128GB+ recommended)
- Recording mode set (24/7 continuous for security, motion-only for storage savings)
- Firmware updated (Settings → Check for Updates)
The [Tapo C120's 15-minute setup](Tapo C120 on Amazon) gets you from box to fully configured camera faster than most competitors — and with better features than cameras costing 3-4x more.
Ready to set up your own Tapo C120? [Get it on Amazon](Tapo C120 on Amazon) and follow this guide for perfect configuration.